TM 9-2350-256-34-1
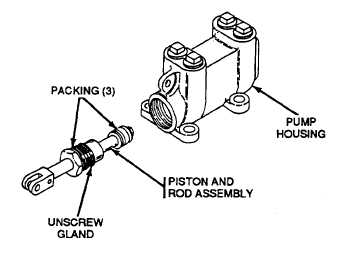
VIEW G. PISTON AND ROD ASSEMBLY.
Figure 3-8. Purge pump-disassembly and assembly (Sheet 2 of 2).
3-27.
Cleaning
a.
Clean dirt and other foreign matter from all metal
parts in dry-cleaning solvent or mineral spirits paint
thinner. Dry with compressed air.
b.
Clean dirt from ferrules on switch leads if
necessary.
3-28.
Inspection and Repair
a.
Inspection.
(1)
Inspect switch leads for cuts or other
damage.
(2)
Check switch for electrical continuity and
switching action.
(3)
Inspect threaded parts for stripping, cross
threading and other evidence of excessive wear.
(4)
Inspect
all
components
for
cracks,
distortion and other evidence of excessive wear.
b.
Repair. Replace all defective components.
3-29.
Assembly
Assemble
the
purge
pump
in
reverse
order
of
disassembly using new packings.
3-30.
Tests
Install the purge pump in vehicle (TM 9-2350-256-20)
and test by using normal operating procedures as
described in TM 9-2350-256-10.
3-16 CHANGE 7