TM 9-2350-256-34-2
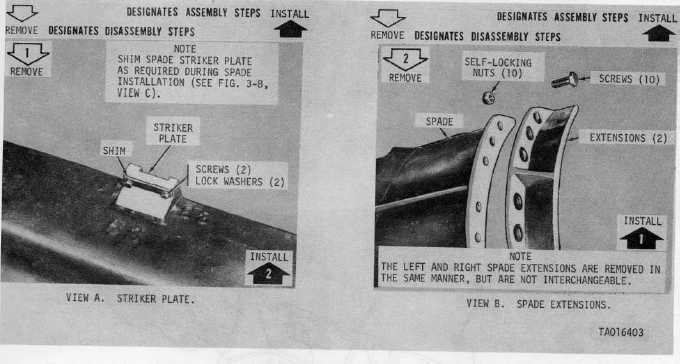
Figure 3-10. Repair of spade.
3-7. Repair of Spade
a. General. Figure 3-9 with is accompanying legend, serves to identify all parts of the spade. The legend also
provides an index to the step-by-step removal of each component during disassembly.
b. Disassembly Procedure. Disassemble the spade as shown in figure 3-10.
c. Cleaning. Scrape accumulated mud and dirt from the spade. Wash with hose and water or steam-clean. Scrape
off chipped and peeled paint.
d. Inspection and Repair.
(1) Inspect spade for nicks, dents, burs and distortion. Remove nicks and burs with a rough file. Straighten distorted
edges and hammer out dents.
(2) Check welds for cracks and defects. Repair damaged welded joints by welding. Paint all areas where bare
metal has been exposed, due to filing, hammering, or peeling.
e. Assembly. Assemble the spade in reverse order of disassembly (fig. 3-10).
3-8. Repair of Main Winch Cable
a. General. Figure 3-11, with its accompanying legend, serves to identify all parts of the main winch cable. The
legend also provides an index to the step-by-step removal of each component during disassembly.
b. Disassembly Procedure. Disassemble the main winch cable as shown in figure 3-12.
3-14


