TM 9-2350-256-34
0051 00
NOTE
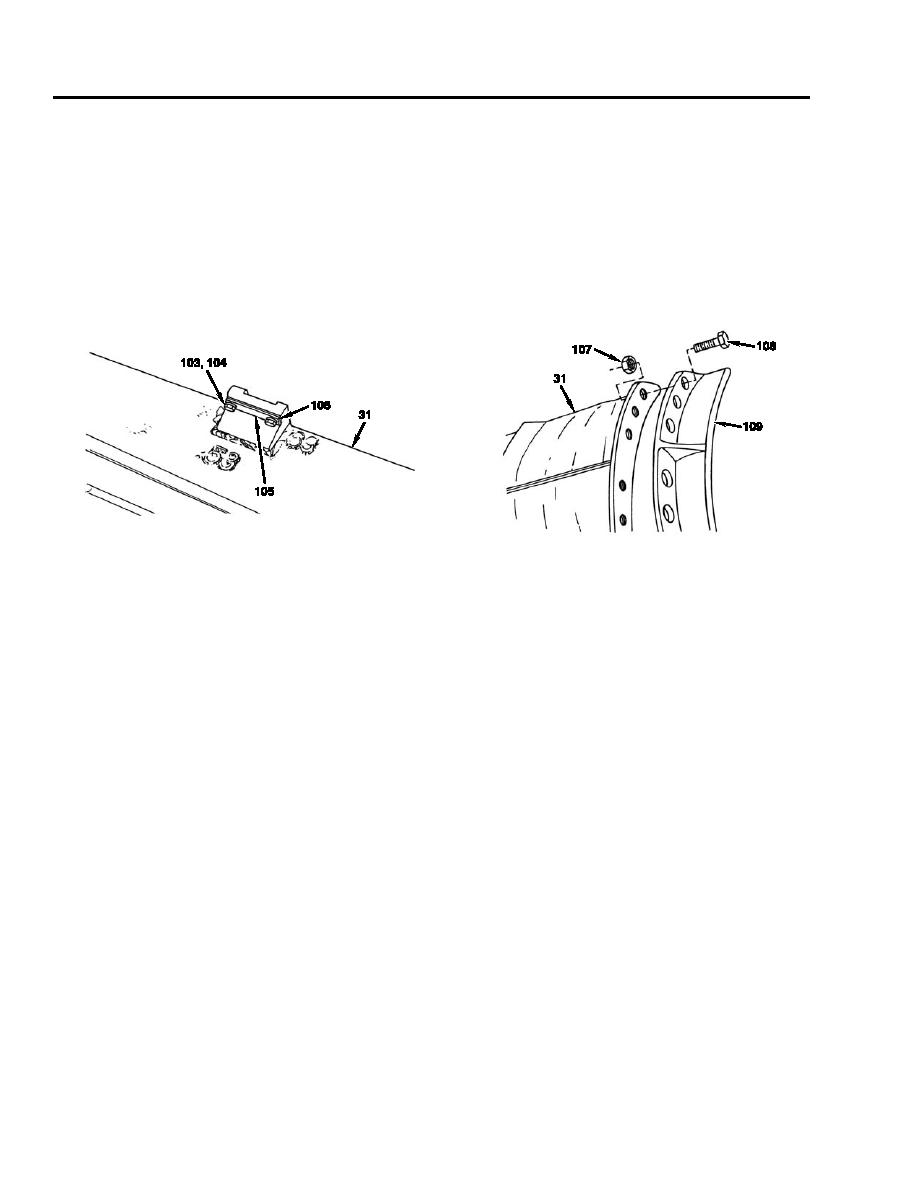
Steps 30 and 31 pertain to disassembly of the spade (31).
30. Remove two screws (103), lockwashers (104), striker plate (105), and shim (106) from spade (31). Discard lockwashers.
NOTE
The left and right spade extensions (109) are removed in the same manner, but are not interchangeable.
31. Remove 10 self-locking nuts (107), screws (108), and two spade extensions (109) from spade (31). Discard self-locking
nuts.
Cleaning
1.
Scrape accumulated mud and dirt from the spade. Wash with hose and water or steam-clean. Scrape off chipped and peeled
paint.
Inspection-Acceptance and Rejection Criteria
1.
Inspect spade for nicks, dents, burrs, and distortion. Remove nicks and burrs with a rough file. Straighten distorted edges
and hammer out dents.
2.
Check welds for cracks and defects. Repair damaged welded joints by welding. Paint all areas where bare metal has been
exposed due to filing, hammering, or peeling.
Assembly
NOTE
Steps 1 and 2 pertain to assembly of the spade (31).
NOTE
The left and right spade extensions (109) are installed in the same manner, but are not interchangeable.
0051 00-18


