TM 9--2350--292--20--2
0648 00--4
AUXILIARY POWER UNIT WIRING HARNESS 3W711 REPLACEMENT --
CONTINUED
0648 00
Removal--Continued
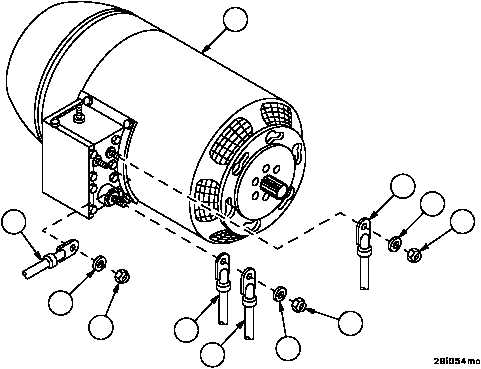
11. Remove self--locking nut (43), flat washer (44) and wiring harness 3W711 wire 478A (45) from terminal D of gen-
erator (42). Discard self--locking nut.
12. Remove self--locking nut (46), flat washer (47) and wiring harness 3W711 wire 61 (48) from terminal A of genera-
tor (42). Discard self--locking nut.
13. Remove self--locking nut (49), flat washer (50) and wiring harness 3W711 wire 62 (51) and lead assembly 3W706
(52) from terminal B of generator (42). Discard self--locking nut.
14. All wires for wiring harness are disconnected; remove harness from APU assembly.
15. Inspect parts for damage and replace as required.
Installation
1. Install lead assembly 3W706 (52) and wiring harness 3W711 wire 62 (51) on terminal B of generator (42) with flat
washer (50) and new self--locking nut (49).
2. Install wiring harness 3W711 wire 61 (48) on terminal A of generator (42) with flat washer (47) and new self--lock-
ing nut (46).
3. Install wiring harness 3W711 wire 478A (45) on terminal D of generator (42) with flat washer (44) and new self--
locking nut (43).
Figure 343
42
48
47
46
49
50
51
52
43
44
45