STARTERS
Rewind Starters
Old Style with Guide Lug
Tie a knot in rope and pull tight. Fig. 13. Make sure
knot in pulley does not contact bumper tangs. Fig. 11.
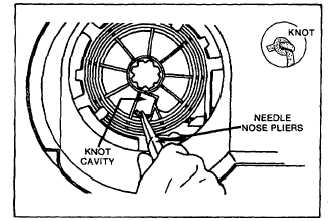
Current Style without Guide Lug
Tie a knot in rope and pull tight. Manipulate knot so it
can be pulled down into knot cavity. Fig. 13.
Fig. 13 - Tie Knot
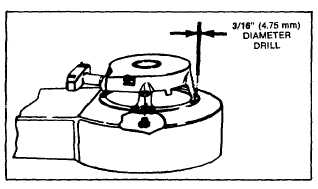
Replace Rewind Assembly
If original starter housing is spot welded to blower
housing, drill out spot welds using a 3/16"
diameter drill. Drill deep enough to loosen spot welds
ONLY. Locate replacement rewind assembly in desired
position. Install screws from inside blower housing up
through starter housing mounting leg. Fasten securely
with nuts as shown in Fig. 14.
Fig. 14
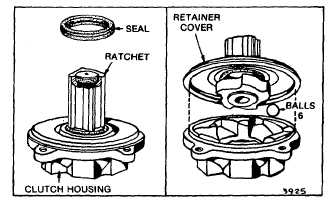
Starter Clutch (Old Style)
Inspect and clean starter clutch assembly as necessary.
Fig. 15 and 16. Do not oil ball cavity area.
Fig. 15 - Starter Clutch (Old Style)
Starter Clutch (Sealed)
Fig. 16 - Sealed Clutch Assembly (Current Style)
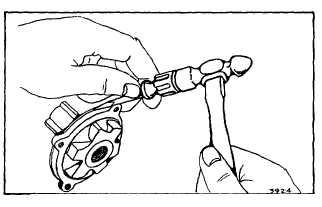
If necessary, the sealed clutch can be disassembled by
using a screwdriver or wedge to pry the retainer cover
from the housing, as shown in Fig. 17. Place one drop
of engine oil on end of crankshaft before replacing clutch
assembly on crankshaft. Tighten clutch to torque noted
on specification sheet for your model engine. DO NOT
run engine without screen screws assembled to clutch.
NOTE: Clean ratchet by wiping with cloth only.
Fig. 17 - Disassembling Sealed Clutch
3