TM 9-2350-256-20
CHAPTER 9: MAINTENANCE OF HULL- AND CAB-RELATED COMPONENTS
9-27 REPLACE/REPAIR COMMANDER’S CUPOLA ASSEMBLY-Continued
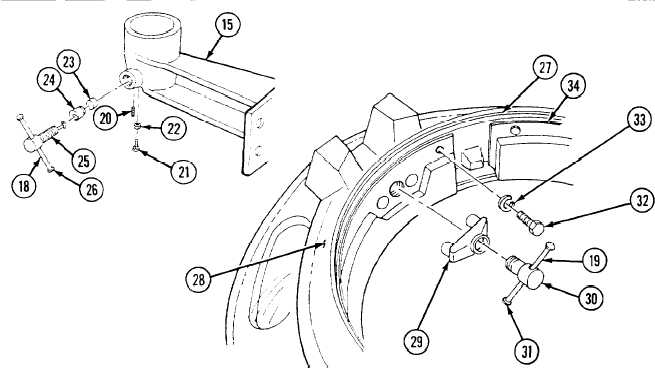
13 Install padding assembly (34) with eight new lockwashers (33) and eight screws (32). Torque not to exceed 96
pound-inches (lb-in.) (10.8 newton-meters [N•m] ).
14
Install new seal (27) by applying adhesive and pressing seal into place.
15
Install lock ring shoe (29) with bolt (30) and new pin (19). Peen ends of pin. Install two buttons (31)
16
Install setscrews (20 and 21), nut (22), block (23), adapter (24), screw (25), and new pin (18) to gun support
pintle (15). Peen ends of pm. Install two buttons (26)
17
Install gun support pintle (15) with four screws (17). Secure screws with new lockwire (16).
Be sure that springs (14) are installed with cupola door (4) open in vertical position. Secure cupola
door open to prevent accidental closure.
NOTE
Allow adhesive to dry before closing cupola door (4)
18 Place cupola door (4) in vertical position and install with six springs (l-t), tube (13), two bearings (12), two
adapters (11). and two cap assemblies (8). Secure cap assemblies with eight screws (9) and eight new
lockwashers (10) each.
19
Secure cupola door (4) with inside latch (47)
9-42