TM 9--2350--292--20--1
0273 00--5
HEADLIGHT ASSEMBLY REPAIR -- CONTINUED
0273 00
Disassembly--Continued
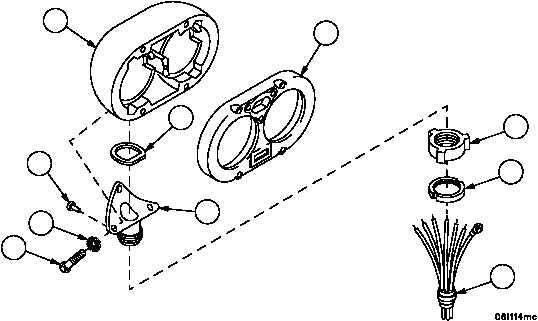
14. Remove headlight ring (49), adjustment nut (1), rivet (50) and harness assembly (51) from headlight holder (52).
Discard rivet.
15. Remove three screws (53), three lockwashers (54), headlight holder (52) and seal (55) from headlight body (7).
Discard lockwashers and seal.
WARNING
16. Remove all sealing compound or adhesive from mating surfaces of cover (6), headlight body (7), headlight ring
(49) and headlight holder (52) with dry--cleaning solvent.
17. Inspect parts for damage and replace as required.
Assembly
1. Apply adhesive to surface of new seal (55) where it mates with headlight holder (52).
2. Install headlight holder (52) and new seal (55) on headlight body (7) with three screws (53) and three new lock-
washers (54). Do not tighten screws (53).
3. Apply sealing compound to mating surfaces of headlight holder (52) and headlight ring (49).
4. Install harness assembly (51), new rivet (50), adjustment nut (1) and headlight ring (49) on headlight holder (52).
Figure 83
49
1
50
51
52
53
54
55
7
6