TM 9--2350--292--20--2
0635 00--5
AUXILIARY POWER UNIT GENERATOR REPLACEMENT (HATZ) --
CONTINUED
0635 00
Installation--Continued
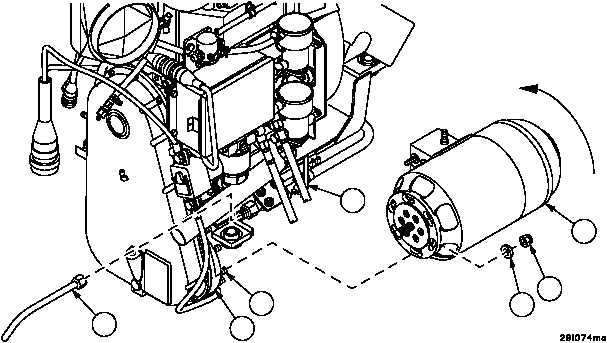
2. Position generator (7) with terminal box between nine and ten o’clock position (when viewed from generator shaft
end). Slide generator shaft into gear hub of chaincase (25). If shaft does not fit easily into gear hub, check shaft
position and adjust as necessary.
3. Align large holes in mounting flange of generator (7) to permit self--locking nuts (24) and flat washers (26) to pass
through mounting flange. Do not let six flat washers (26) get stuck between chaincase (25) and generator mount-
ing flange.
4. When six flat washers (26) and six self--locking nuts (24) have cleared mounting flange, turn generator (7) coun-
terclockwise (as viewed from the generator shaft end) as far as mounting flange slotted holes will allow. Gain ac-
cess through the generator case vent holes and tighten six self--locking nuts (24).
5. Install tube (22) to drain valve (23).
22
25
27
23
7
24
26


