TM 9-2350-238-10
LAMP REPLACEMENT– CONTINUED
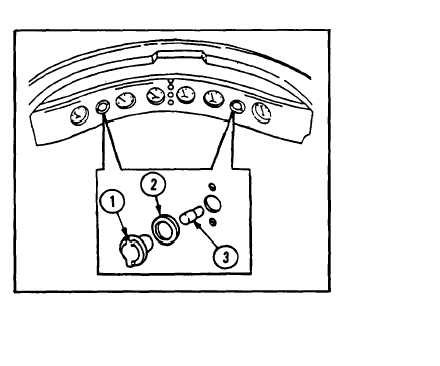
ENGINE-TRANSMISSION LOW OIL WARNING
INDICATOR LIGHT AND GENERATOR
CHARGE INDICATOR LIGHT
1
2
3
4
Unscrew indicator light lens (1). Remove
lens (1) and gasket (2).
Check for cracked, damaged, or torn in-
dicator light lens (1) and gasket (2). If
condition exists, notify unit maintenance
personnel.
To remove LED (3), depress and turn
counterclockwise. Apply a light coat of
silicone compound (item 38, appx D) to
socket before installing new LED (3). in-
stall new LED (3) (item 29, appx D),
depress and turn clockwise to secure.
Reinstall gasket (2) and screw indicator
light lens ( 1 ) on securely.
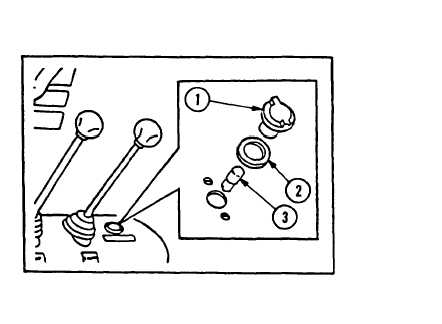
FILTER BYPASS LIGHT
1
2
3
4
Unscrew filter bypass light lens (1).
Remove bypass light lens ( 1 ) and gasket
(2).
Check for cracked, damaged, or torn lens
(1) and gasket (2). If condition exists,
notify unit maintenance personnel.
To remove LED (3), depress and turn
counterclockwise. Apply a light coat of
silicone compound (item 38, appx D) to
socket before installing new LED (3). in-
stall new LED (item 29, appx D), depress
and turn clockwise to secure.
Reinstall gasket (2) and screw bypass
light lens (1 ) on securely.
3-40


