TM 9-2350-238-10
LAMP REPLACEMENT–CONTINUED
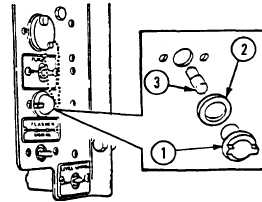
FLASHER INDICATOR LIGHT
1
2
3
4
Unscrew flasher indicator light lens (1).
Remove lens (1) and gasket (2).
Check for cracked, damaged, or torn
flasher indicator light lens (1) and gasket
(2). If condition exists, notify unit
maintenance personnel.
To remove LED (3), depress and turn
counterclockwise. Apply a light coat of
silicone compound (item 38, appx D) to
socket before installing LED (3). Install
new LED (3) (item 29, appx D), depress
and turn clockwise to secure.
Reinstall gasket (2) and screw flasher in-
dicator light lens (1) on securely.
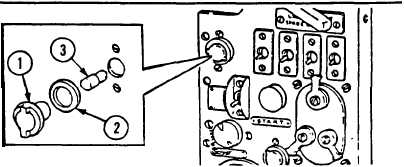
CLUTCH ENGAGED INDICATOR LIGHT
1
2
3
Unscrew clutch engaged indicator light
silicone compound (item 38, appx D) to
lens (1). Remove clutch engaged in-
socket before installing LED (3). Install
dicator light lens (1) and gasket (2).
new LED (3) (item 29, appx D), depress
and turn clockwise to secure.
Check for cracked, damaged, clutch
engaged indicator light or torn lens (1 )
4 Reinstall gasket (2) and screw clutch
and gasket (2). If condition exists, notify
engaged indicator light lens (1 ) on
unit maintenance personnel.
securely.
To remove LED (3), depress and turn
counterclockwise. Apply a light coat of
3-41


