SECTION V: CONTROLS AND LINKAGES
TM 9-2350-256-20
34
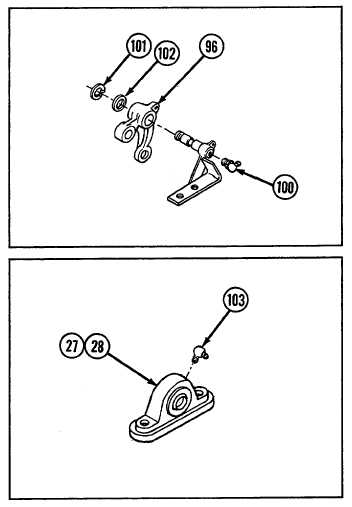
Remove lubrication fitting (100), retaining ring
(101), flat washer (102), and bell crank assembly (96).
b.
DISASSEMBLY
Remove lubrication fitting (103) from bearing units (27 and
28).
c.
CLEANING
WARNING
Particles blown by compressed air can be
dangerous. Be certain to direct airstream away
from yourself and other personnel in the area.
Compressed air used for cleaning will not exceed
30 psi (207 kPa). Use only with effective chip-
guarding and personal protective equipment
(goggles/shield and gloves).
Clean rubber parts in mild soap solution. Rinse in clean
water and dry with compressed air.
d.
INSPECTION
1
Inspect all parts for cracks and distortions.
2
Inspect connecting and pivot parts for excessive
wear.
3
Inspect bearings for damage.
4
Inspect threaded parts for cross threading and
nicks.
5
Inspect rubber parts for cracks and hardening.
e.
REPAIR
1
Straighten any rods which are bowed.
2
Replace any badly worn clevis rod ends or pins.
3
Repair damaged threads with thread restoring file where possible, or replace defective threaded parts.
4
Replace defective rubber parts.
f.
ASSEMBLY
Install lubrication fitting (103) to bearing units (27 and 28).
9-177


